By Jennifer Walden
AI technology (probably) isn’t the humanity-destroying rise of the machines that some fear—at least not in the world of post-production. It’s showing up all over the film industry, from helping to cast actors to achieving incredible visual effects transformations, like turning actor Josh Brolin into Thanos for “Avengers: Infinity War.”
In the world of post sound, sound designer Randy Thom on “The Midnight Sky” used artificial intelligence to study the characteristic vocal traits of George Clooney (who played Augustine) and then incorporate those into the voice of young Augustine, played by actor Ethan Peck, helping the audience to believe that these two actors were both Augustine, just at different ages.
In our last issue, Flame finishing editor Christopher Doyle spoke of the promising AI machine learning capability of Autodesk Flame 2020 in helping to remove unwanted objects from scenes.
Colorists are also seeing the benefits of artificial intelligence. Time-intensive technical tasks, like matching shots between different cameras, can happen faster. That’s what Color Intelligence’s Colourlab Ai (colourlab.ai/) is offering with their standalone application for macOS.
Initially designed to seamlessly integrate with Blackmagic Design’s DaVinci Resolve Studio, a recent update now allows Final Cut Pro editors to simply drag-and-drop their timeline into the Colourlab Ai application and get to work. While Colourlab Ai also supports workflows for other major non-linear editing (NLE) systems, like Adobe Premiere Pro and Avid Media Composer, their future goal is to have a deep level of integration with those, like they do with Resolve or Final Cut Pro.
Colourlab Ai was officially launched in November 2020, but already v1.2 has been released with six new major features—like the aforementioned Final Cut Pro timeline drag-and-drop feature, a Camera Profile tool that automatically detects different media sources and applies the proper color-managed camera profile for efficient camera matching, support for all ARRI’s Raw formats so one can play any ARRIRAW file, and support for CANON Raw — and over a hundred other improvements.
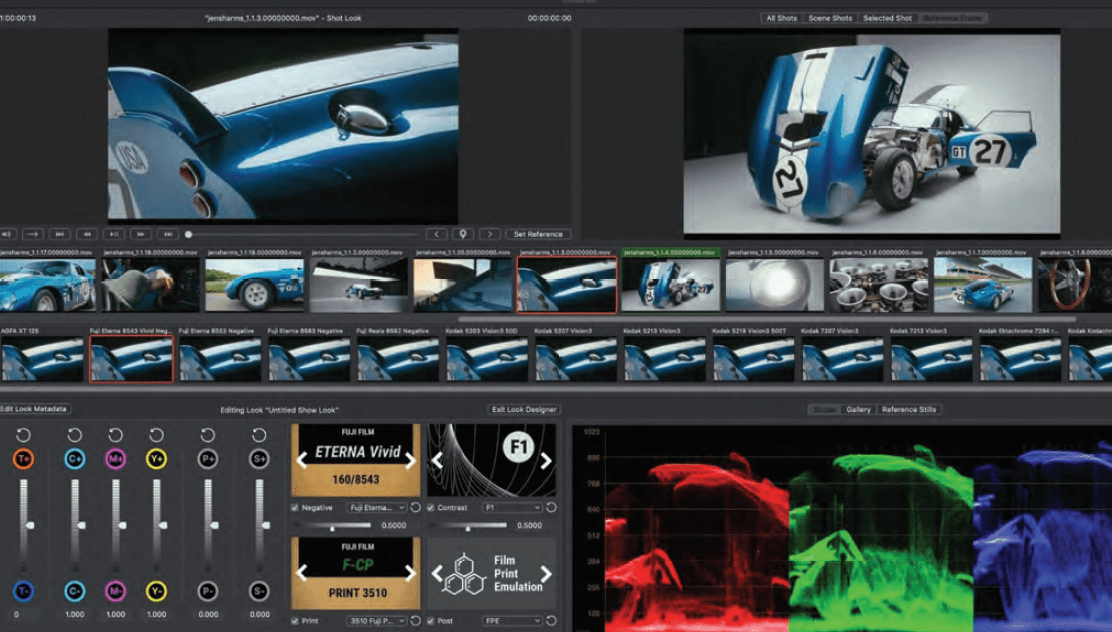

“Dado [Valentic, Color Scientist/Founder/CEO of Color Intelligence] is coming up with a lot of great new features all the time. It’s like a continuation of learning on a daily basis for everybody. Dado and his development team are really creating something that helps us to be more creative a lot easier because there are a lot of really technical steps that need to happen out front before you even start pushing the knobs and turning the dials,” said Eric Babinec, Digital Film Colorist/CEO of Colortime Pictures, Inc. in Los Angeles, Calif.
Babinec (who’s been working as a colorist in Hollywood for over 30 years) attended Valentic’s film masterclass at AbelCine a few years ago, where Valentic hinted at building an app for colorists that would use artificial intelligence.
“I’m always looking to stay on top of technology so I automatically got involved with the beta programs. I felt like the writing is on the wall about our industry. Once you start introducing AI into a particular field, people start to kind of panic about those things. They look at AI and think, ‘AI. That’s a job killer.’ Job security is a huge concern. But, I must say, this will not eliminate jobs. This will only create a smoother experience for colorists to help them get to the end game faster.”
Those sentiments are echoed by Nat Jencks, Supervising Colorist at Technicolor-PostWorks NY, whose recent work includes Steven Soderbergh’s upcoming “No Sudden Move” and Lena Dunham’s upcoming “Sharp Stick.”
Jencks said, “In general, the term ‘AI’ tends to conjure up an image of a machine replacing a human. That is not helped by the Silicon Valley marketing machine which frequently plays into this vision. We anthropomorphize computers in a way where it feels like they’re going to be making these decisions for us, and these visions capture our imagination because it’s more exciting than thinking of it as simply a new class of algorithm. The reality is that a lot of these programs using machine learning actually open up new opportunities for the artist; they are just another tool in the toolbox. They are not a replacement for the operator. Ultimately, they do need someone to drive them.”
Colourlab Ai isn’t intended to automate the entire color correction/grading process. But it has the potential to significantly speed up some mundane-yet-necessary aspects, like selecting IDTs and camera matching. With Colourlab Ai’s Camera Profile tool, that happens automatically when media is imported. “To me, the idea of separating out the parts of the process which are potentially automatable is really exciting. The more the tools can help push everything else out of the way, the greater our ability to focus on creative choices — to do something that is pushing the film forward creatively,” Jencks said.
In regards to the Camera Profile tool, Babinec said, “The ability to have it basically auto-detect the camera profile and put the transformation on it right away is super-huge, because if you’re looking at 500 different clips and they all come from different sources, it’s time-consuming to sort them out. This tool makes it a lot easier to work with files from different types of cameras. Even though the shots are from different cameras, Colourlab Ai will analyze them and do its best to figure out how to make that look consistent across those shots. It’s still early on in the development but Dado (who is an award-winning colorist) knows what needs to happen. They’re really making a great effort with this, but there are so many different cameras.”
Another new way to further refine the look in Colourlab Ai is the ‘Frames of Interest’ feature. In working with a particular clip, clicking the ‘Frames of Interest’ tab opens up a small window showing which shot in the clip is the darkest shot, the brightest shot, the best match to reference, the worst match to reference, and the frame the user initially selected. Clicking through the five options, it’s easy to see which one best matches the reference shot, or which gives the preferred result.
 “It will analyze the different shots and recalculate based on the target you select. Once you commit to a look, you can send it back to DaVinci Resolve for further refining,” said Babinec. “This is a super powerful feature that helps you refine a look faster. Instead of starting from scratch on each clip, we can start from a determined point and move forward. Sometimes the processing gets us 50% of the way there, sometimes 80%, and sometimes it’s dead on. I can only imagine that it’s just going to get better and better.”
Step one is properly identifying/transforming the different source material so that it’s being displayed as intended. Step two is look development. “When a DP says, ‘I want this particular look’ and they send over some screenshots as reference, using the Look panel inside the Colourlab Ai interface, you can take that and basically propagate that over multiple clips really fast,” said Babinec.
This was very effective while working with a director recently on a non-theatrical feature. Babinec and the director decided on looks for different scenes — nighttime, dark scenes, suspenseful scenes, romantic scenes — and then Babinec used Colourlab Ai to propagate those looks across all of the clips within those scenes. “It really made it a lot faster of an experience than trying to rebuild each different shot from scratch,” he said.
Although Jencks is not using these tools for final color, he sees potential future uses of Colourlab Ai in the dailies process “where we are sometimes processing a tremendous amount of footage with a tight turnaround,” he said. “Any tool which can speed up the routine part of that process and get the dailies colorist more time to study the day’s footage, that’s a really interesting, exciting idea.”
Jencks feels that often using a minimal toolset in dailies is the best approach — for instance, just using printer lights in a correctly set up color pipeline — so that the dailies colorists or DIT doesn’t accidentally impose extra ‘flavor,’ because to some degree, the dailies serve as a mirror for the cinematographer and the filmmakers, showing the image that’s actually being captured.
“I like that Colourlab Ai has designed in the ability to limit the tools the system is using and then, also, to see exactly what it has done. If you ripple what it does into Resolve—say for example, printer light adjustments—it’s very easy to see what’s been done and either use it or not, or tweak it,” he says. “They’re working on giving the user more control over the type of strategies that the system might be using for its matching. So you could have it match the contrast or just match the color or those types of things.”
Jencks added, “These tools are really in their infancy. I see a future workflow where cameras record positional data, and lens data, and systems run 3D camera tracks in the background, helping to automatically identify wide shots, close ups, tracking shots, and other key features to identify singles, two shots, etc. Machine learning algorithms love data, and the more data we are able to feed them the more useful they become.”
Interested in exploring Colourlab Ai? Download the Free Trial version, which includes the Colourlab Ai standalone app for macOS, plus Look Designer and Grainlab plugins for DaVinci Resolve. Note: the only limitations are the export and render options are disabled. Additional video tutorials and reference resources can be found on the Colourlab Ai website in the Support section, or on the ColourLab Ai YouTube channel.
Still not sold on the advantages of artificial intelligence in color grading? Not to worry. Other color grading systems haven’t yet taken that leap but are offering some interesting advances in color grading.

Colorist Gino Panaro, at SSI Advanced Post in Los Angeles, started his career 29 years ago at Editel/LA, where he advanced from assistant to colorist. “Transferring film was a dream. It was magic to take a film reel and create different looks. As film transitioned to video, I moved onto learning FilmLight’s Baselight, DaVinci Resolve, and Autodesk’s Lustre,” he said.
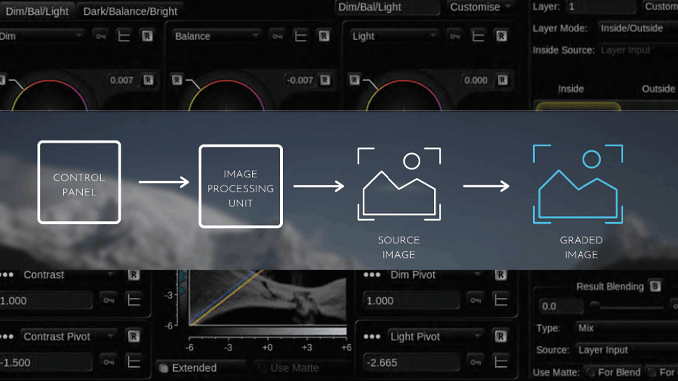
At SSI, Panaro colors trailers and spots for film campaigns using FilmLight’s Baselight v5 (filmlight.ltd.uk/products/baselight/overview_bl.php). “What really drew me into Baselight is how it handles color in a very organic way. From the camera original file to the final render, you have control over the whole process,” he said.
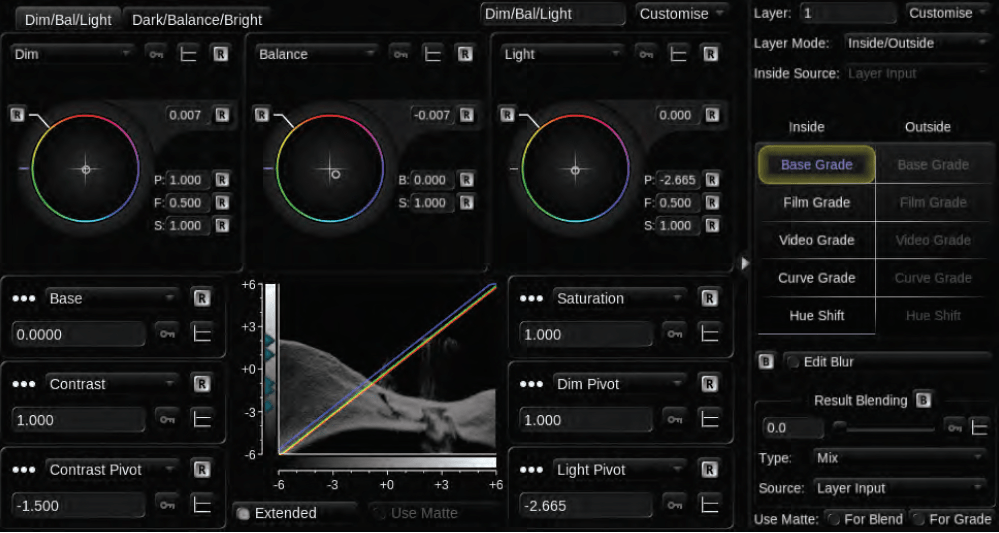
Since Baselight works with layers, Panaro can set his grade with a base layer and gradually build from there. “Base Grade is a feature that I’m using more every day as a way to get specific and affect certain areas of the image. I can easily find a certain level of highlight, for example, and adjust its intensity and the color,” he said. “The Base Grade layer offers a great deal of control over the highlights and deep blacks. It’s probably one of the best additions to the software.”
While working on a recent project in HDR, Panaro’s client requested to open up a few very dark scenes in a film trailer to reveal more detail. It seems like a simple task, but Panaro’s challenge was to achieve the desired result while not taking away from the original grade. “At first, I used a layer to open the blacks and mid tones. This worked pretty well, but then I remembered that Baselight has a Boost Shadows layer that you can use to get more detail. It gave me the control I needed to get the look the client wanted very fast. I was very impressed with how well this worked,” he said.
Panaro works as part of a team with other colorists, editors, and sound editors/mixers, so it’s important that the color grading system fit nicely with the overall facility workflow. Sharing session seamlessly between two color bays is beneficial on large film campaigns where there’s a need to reference and access previous spots and trailers. “In our workflow, Baselight is bookended by editorial. We import the ungraded edited piece into Baselight, and then export back the graded files for editorial to add titles and audio,” he noted. “And while I don’t often do visual effects fixes in the color bay, sometimes I get to use the paint layer (another favorite feature in Baselight) to paint over signs and blemishes. The best part is that you can track it!”
One new feature of Baselight 5.3 is the improved trackers. Baselight v5 introduced area-based trackers, making perspective-based tracking possible. With 5.3, trackers and planes can be custom-named, making it simple to share them among different layers. And there’s also a high-pass/low-pass filtering option for the trackers. Panaro said, “The trackers in v5.2 are already very good but I like the improved perspective tracker in 5.3 and the ability to place tracker points where they will be the most effective,” he said.
Additionally, FilmLight has improved Looks that can be added to the grade. “They help keep the dynamic range that you need,” said Panaro. “The best part about the Looks layers is that you can stack them and adjust them to create new ones.”
Even without the assistance of artificial intelligence, Panaro feels that Baselight is a very deep color grading tool that can create beautiful images with simple layers but also offers the flexibility to get more complex if needed. “You have the option to add prebuilt Looks and FX layers. One that I use often is the Cook Beauty layer. It’s a nice way to beautify skin tones instead of using defocus and a key, and you can mix it back in to adjust how much you would like to use,” he concluded.
-Jennifer Walden is a freelance writer specializing in technology.

